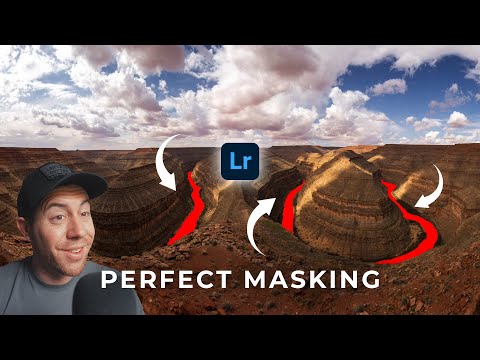
Five game-changing Lightroom masking tricks to make your life easier
Jul 4, 2023
Dunja Djudjic
Dunja Djudjic is a multi-talented artist based in Novi Sad, Serbia. With 15 years of experience as a photographer, she specializes in capturing the beauty of nature, travel, and fine art. In addition to her photography, Dunja also expresses her creativity through writing, embroidery, and jewelry making.
Share:
Five game-changing Lightroom masking tricks to make your life easier
Jul 4, 2023
Dunja Djudjic
Dunja Djudjic is a multi-talented artist based in Novi Sad, Serbia. With 15 years of experience as a photographer, she specializes in capturing the beauty of nature, travel, and fine art. In addition to her photography, Dunja also expresses her creativity through writing, embroidery, and jewelry making.
Share on:
Lightroom’s masking capabilities have skyrocketed over the past year or so, making me love this editing software even more. But since Adobe introduced quite a lot of new masking features at once, it can also get a little confusing and easy to miss some of the fantastic tools that are now at your disposal. In his latest video, Michael Shainblum shares five masking techniques in Lightroom that will make your life easier and made editing more enjoyable.
While Michael focuses on landscape photography, these masking features work perfectly well with other types of photos too. In fact, Adobe recently added facial hair masking. That’s just something to keep in mind, and now – let’s dive in!
Technique 1: Radial Gradient Vignettes
We’re kicking off with the basics before we ramp it up. If you want to add a vignette, you might usually use the Vignette tool. Sounds logical, right? But Michael suggests that you may want to try the radial gradient tool instead. With the image opened in Lightroom Classic, click on the masking tool and select the Radial Gradient. Start from the center and drag the mask outward a little further than the canvas. Next, lower the exposure and click “invert” so that you’re impacting what’s on the outside of the circle, not what’s on the inside.
So what’s the advantage of this method? It gives you a simple yet effective way to create a vignette, apparently. But more importantly, it gives you more control over your vignette and more chance of fine-tuning it. Depending on the photo, you can drag the radial gradient from your subject outwards instead of from the center and then invert the mask. This way, you can put a little more light on the subject and make it stand out more. Don’t overdo it, though.
Technique 2: Sky Select Technique and Variations
Here’s one of my favorites: the “Select Sky” button. When you hit it, it creates a perfect selection of the sky almost every time. You may need to touch it up a bit, but you can easily do it by adding or subtracting sections using the Brush tool.
You can also invert the sky selection mask and create a ground selection. This way, you can do any edits to the ground separate from the sky. Adding a bit of haze on the horizon is another handy way to use this tool.

Technique 3: Color Separation with Color Range
The color range mask is another fantastic tool, and if I’m being honest, one that I almost never use. But don’t be like me! This is a powerful tool that lets you isolate a particular color using the eyedropper. For example, select the blues to darken them, then refine the adjustment as needed. You can also select different areas, like clouds, and adjust the white balance to maintain blues in the sky while adding warm tones to the clouds.
Remember, you can always refine your mask by clicking the add or subtract icon. From there on, you can add or subtract the selection using different methods – so you get all the flexibility possible.

Technique 4: Object Selection
Here’s the tool that left Michael mind-blown, and I felt the same when I first started using it – the Object Selection tool. As the name suggests, you can select specific objects in your image and adjust them. Let’s say you wanted to select a river in your photo and make it a little bit brighter. Draw along the river, and the tool does a flawless job selecting it for you.
Michael notices that, even with complex selections like a foreground, the Object Selection tool shines. Michael also put the Object Selection tool to the test with some tricky images and intricate shapes. Whether it’s selecting rivers with varying lighting or complex shapes, this tool aced all the tests.
However, one downside is that you don’t have much control to soften this tool within the tool itself. To achieve that, you’ll need to make a separate mask with the Brush tool along the edge of the selection, to make a smoother transition.

Technique 5: Curves and Multiple Combined Masks
The last technique involves combining masks and using the curves adjustment, which Lightroom recently added. You can make a radial gradient, invert it, and make a vignette for the photograph. Then adjust the curve to alter the shadows, making them a little softer.
If you want your vignette not to affect certain areas, like rivers in Michael’s case, you can use the Object Selection tool to remove those parts from your vignette. This flexibility makes Lightroom a powerful tool to guide your viewer’s eyes to or away from certain parts of the image.
And there you have it! With these techniques up your sleeve, you’ll achieve so much more in Lightroom and do it much faster. And if you ask me – this makes editing more enjoyable too, as I normally don’t really like this part. Lightroom has evolved significantly, and Michael notes that this makes him rely much less on Photoshop nowadays It’s the same for me, which is another part I like – finish everything in one program, and it’s ready to publish or print. These masking tools definitely add to it, so make sure to play with them if you still haven’t!
[This SIMPLE Tool is a Game Changer | Masking Tips & Tricks in Lightroom 2023 | Michael Shainblum]

Dunja Djudjic
Dunja Djudjic is a multi-talented artist based in Novi Sad, Serbia. With 15 years of experience as a photographer, she specializes in capturing the beauty of nature, travel, and fine art. In addition to her photography, Dunja also expresses her creativity through writing, embroidery, and jewelry making.


Join the Discussion
DIYP Comment Policy
Be nice, be on-topic, no personal information or flames.